Thursday, August 31, 2017
Wednesday, August 30, 2017
Tuesday, August 29, 2017
Q. Which MIDI velocity curve should I use with my controller keyboard?
I've just bought a new MIDI controller keyboard that has a selection
of velocity curves. How should I go about choosing which one to use, and
why is this necessary?
Philip McKay via email

Many MIDI keyboard controllers feature a clutch of different velocity curves, such as these. From left to right, the linear setting is always a good starting point, but switching to the convex curve will give you greater control over louder notes, the saturated curve will deal with keyboards that won't otherwise generate maximum MIDI velocities, and the concave curve is the one to choose if the quiet end of the MIDI velocity range feels all 'bunched up' on your keyboard.
SOS contributor Martin Walker replies: Some keyboardists play harder than others, while keyboard controllers themselves can vary a great deal in their mechanical resistance, action and feel. If you come from a synth background, a weighted, hammer‑action keyboard may feel very heavy and ponderous to play while, conversely, if you're used to playing acoustic pianos, a lightweight, synth‑action keyboard may feel lifeless. However, the ultimate goal is always the same.
MIDI supports 128 different velocity values (from zero to 127) and, whichever velocity‑sensitive keyboard you choose, it should let each player generate this complete range of values smoothly as they dig into the keys, from soft to hard. This is the reason why most keyboards offer a selection of velocity curves.
Many modern sample libraries feature eight, 16 or even 32 velocity layers per note, and if your keyboard doesn't let you generate the full range of MIDI velocity values you may never hear some of these layers. This, in turn, means that your sounds may lack expression or sound dull or harsh, or it might mean that you never hear special effects programmed for high velocity values only, such as piano hammer noise, guitar harmonics or bass slaps.
It's generally best to start by trying the linear velocity curve that generates smoothly increasing velocity values as you play harder (see graph above). Some makes and models of controller keyboard do manage to do this over the full range but, in my experience, many don't generate any velocity over about 110, unless you hammer the keys really hard. The different curves stretch one or more velocity areas across the mechanical range. Don't get too hung up on the shapes themselves, it's more important to just play and see what velocity values you can generate.
You can choose the most expressive velocity curve by simply playing a favourite sampled instrument, such as a piano, but this can prove a tedious process. You may achieve the perfect response with 'loud' notes only to find that the soft notes now play too loud, or vice versa, or you may find that you only have the perfect response for that one instrument. It's better to be a little more systematic and monitor the MIDI velocity values themselves as you play, to check that you can move smoothly across the entire range. There are plenty of visual options for this purpose, including various sequencers that display incoming MIDI velocity as a level meter, or software utilities such as MIDIOX (see www.midiox.com for details).
Once you've chosen the most suitable preset curve for your playing style, a one‑off bit of final tweaking may make your keyboard playing even more expressive. For instance, my main controller keyboard smoothly generates MIDI velocities from 0 to 110, but struggles above this, so I just convert this input range to an output range of 0 to 127 using the MIDIOX Data Mapping function or a MIDI velocity-curve changer (see this one from www.trombettworks.com/velocity.php).
Most sequencers, and even some hardware/software synths, let you tweak incoming velocity values in this way, either using MIDI plug‑ins, such as VelocityCurveSM (www.platinumears.com/freeplugins.html for more information) or specialised built‑in functions, such as the Cubase MIDI Input Transformer. For a 'plug in and forget' hardware solution, you can buy a small box, such as MIDI Solutions' Velocity Converter (found at www.midisolutions.com/prodvel.htm), which is MIDI‑powered and offers 40 preset curves, plus a user‑defined one.
Some keyboards also include one or more 'fixed' velocity options that always generate the same MIDI velocity however soft or hard you play. These can be useful for playing sampled instruments with no velocity sensitivity, such as organs, and for step‑recording drum parts or simple synth tracks. A setting that always generates MIDI velocity 127 can also be invaluable for sound designers who need to ensure that their presets will never distort.
Monday, August 28, 2017
Saturday, August 26, 2017
Q. How should I mike-up a violin?
I am attempting to record a violin for the first time. I want a nice
deep sound, but am unsure about using stereo mic techniques such as M/S,
X-Y or ORTF, for example. I want to get the most natural sound possible
with minimal amounts of processing.

When recording a violinist, it's important to find the right room; violins do not respond well to close miking techniques, and the rich tonal quality of the instrument may be lost in a small, dead‑sounding space.
Photo: Danchuter / Wikimedia Commons
The recording space is less than ideal: not a nice reflective surface with good acoustics, which would lend itself to distant miking techniques, but a small, treated, dead space that doesn't have an especially nice sound. Will I have to use close mic techniques and artificial reverb, or can I get a reasonable sound out of the room?
I have a pretty good selection of microphones to choose from and have thought about using large diaphragm condenser mics, such as AKG C414s but, if close mics are the way to go, I also have access to dynamics. I want to capture the full, rich sound of the instrument and have looked at some diagrams showing the frequencies present at different places around the room; now I am wondering if I would need different types of mics at different places? I will be using a PT8 HD system and have hired a Neve desk. I might also add some tape warmth afterwards with a Studer tape machine.
Via SOS web site
SOS Technical Editor Hugh Robjohns replies: If you want a natural, full-bodied sound from a violin, you have to give it space. Close miking will always sound coloured by comparison and there will be a disproportionate amount of mechanical bow noise. Recording in a small, dead acoustic will result in a small, dead-sounding recording, no matter what you do in post-production.
When recording music the priorities are the music, the performer and the place, in that order. After that you can think about where to put the mics and the types of mic to use. And only then should you think about preamps, converters and recorders, for example. Your priority should be to find an acoustic space worthy of the performance, and then work out how to record there.
As far as the stereo techniques are concerned, there's really no point in close‑miking a violin in stereo. The instrument is not big enough to warrant it. However, recording a violin performance in a nice‑sounding room often is worth doing in stereo, although whether you choose to work with X-Y, M/S or ORTF, for example, will depend on the nature of the room acoustics, the perspective you require, and the kind of stereo imaging you favour. All those techniques (and more) can produce pleasing results in the right situations.
For mic choice on a solo violin, personally I prefer to use either small-diaphragm omnidirectional mics (I think they sound significantly more natural than cardioid mics), or ribbons. The latter tend to give a smoother, more mellow sound, while the former retain more edge and detail. Which is best will depend on the music, the instrument and the technique. For a stereo recording, my personal preference would probably be X-Y ribbons or spaced omni small-diaphragm condensers (with a spacing of about 30cm).
Whatever mics you choose, though, avoid anything with a big presence peak and invest plenty of time in experimenting with both the position and height of the mic(s) around the player. You'll be amazed at how dramatically the sound and tonal balance can vary in different places, and with different instruments and players! Finally, I'd suggest finding a room with lots of wood; a wooden stage or wooden wall panelling (or a wooden, vaulted ceiling) helps to maximise the tonal qualities of the instrument.
Published June 2010
Friday, August 25, 2017
Thursday, August 24, 2017
Q. How do normal DAWs differ from mastering workstations?
Why are there specific systems like SADiE, CEDAR, Sonic Solutions to
master with, as opposed to, say, Logic, Cubase and Pro Tools? To me,
they both seem to just be multitrack DAWs!

The capabilities of DAWs and mastering workstations have converged over the years. An example of this is in Pro Tools 8, which started off as an audio editing system, but now has very sophisticated MIDI facilities and plug‑in support.
Via SOS web site
SOS Technical Editor Hugh Robjohns replies: I think it's inevitable that DAWs of all kinds will converge in functionality over time. The evidence of that convergence is already plain to see in many cases. However, in the early days of digital audio editing and workstations, the complexity of these new technologies meant that manufacturers tended to specialise in specific areas of functionality.
The original MIDI‑based sequencers — such as Notator (now Logic), Cubase and their ilk — have all gradually added audio recording and editing tools, while the originally pure audio-editing systems — such as Sound Designer, SADiE, Sonic Solutions and Pro Tools — have gradually added MIDI facilities and plug‑in support. So the difference between systems is far less clear now than it once was.
However, the inertia of change has meant that some systems still retain strong specialisms and are favoured on that basis. For example, CEDAR started as a largely off‑line post‑processing platform for audio restoration, but its current incarnation includes sophisticated audio recording and editing facilities to improve the convenience of using it as an 'on‑line' tool.
SADiE started out, fundamentally, as a radio programme production platform. Its audio editing tools and workflows are geared up for very slick and versatile audio manipulation, which is precisely why it has been seized upon as the almost de facto music mastering system, essentially replacing the original king in that role, Sonic Solutions. However, there are other popular alternatives, such as Sequoia and Pyramix (in the professional sector) and very capable lower‑cost options, such as Wavelab and Adobe Audition.
In the mastering role, the most important features are very accurate and flexible editing facilities combined with all the behind‑the‑scenes tools for PQ creation, ISRC (International Standard Recording code) and so on, as well as the ability to generate the industry-standard DDPi mastering files. So generally these systems tend to have less well‑endowed MIDI facilities and internal or plug‑in processing, simply because they aren't required.
However, when it comes to the music production platforms, MIDI is obviously fundamental, so, while systems like Cubase, Logic and Digital Performer, for example, tend to have slightly more clunky audio editing tools, they do incorporate sophisticated MIDI features, very comprehensive internal signal processing, and support for plug‑in effects.
Pro Tools started out as an audio editing system, but has gradually acquired more and more sophisticated MIDI facilities and plug‑in support. This platform, perhaps, represents most clearly the idea of total convergence.
(SOS) Published June 2010
Wednesday, August 23, 2017
SuperSpeed USB 3.0
The need for speed continues with the release of Intel's new optical cable technology, hot on the heels of Superspeed USB 3...

With a bandwidth of 10Gb/s, Intel's Light Peak technology aims to supersede a clutch of existing I/O formats while banishing ground-loop problems for ever.
This month, we offer various glimpses into the future for the PC musician. Superspeed USB 3 may be just arriving on a PC near you, but it's already about to be superseded in the battle of the I/O formats. Intel (http://techresearch.intel.com) are hoping to ship components for their latest Light Peak optical cable technology sometime in 2010, and with bandwidths starting at 10Gb/s (enabling a Blu‑Ray movie to be transferred in less than 30 seconds), and the potential of 100Gb/s capability within 10 years, this is getting a lot of people excited.
Intended as a universal replacement for PCI Express, SATA, SCSI, USB and Firewire, Light Peak consists of an Intel controller chip and an optical module that performs all the electricity to light conversions. Cables can be up to 100 metres long and, of course, the optical design removes any possibility of ground loops (hooray!).
µTonic Patternarium

Want to influence the future of drum patterns? Try the Sonic Charge Patternarium.
In another glimpse into the future, Magnus and Fredrik Lidström of Sonic Charge (www.soniccharge.com) have launched the µTonic Patternarium, an extremely inventive and fun way for anyone to influence their future products on‑line. Like the Synplant (reviewed in SOS June 2009), the µTonic VST/AU plug‑in takes a genetic approach to sound creation, rendering its synthetic percussion sounds and patterns in real time, using no samples or prepared waveforms.
While µTonic itself has been available for some time, the Patternarium is a masterful marketing ploy. Described as an 'online collaborative patch randomizer', it continuously generates new sounds and rhythms for µTonic through principles of evolution. Basically, the Sonic Charge servers regularly generate 1000 new µTonic patterns at a time, each one being the cross-product of two other patterns, picked at random, along with its own randomly generated name. Existing µTonic users can download any pattern that appeals to them, and even copy and paste it directly from the browser to the synth.
However, whether or not you own µTonic, you can audition as many patterns as you like using the animated lightshow of Patternarium and give each a 'thumbs up' or 'thumbs down'. Those that receive the highest number of votes will prosper and procreate in the next generation. With 100,000 hits and five generations of patterns generated in the first four days, who knows where these sounds are heading?
Anyone can participate and influence the outcome of Patternarium simply by voting. You could call it 'Musical Darwinism' and, with a new version of µTonic in the offing, you can bet that Magnus is analysing the development of these patterns with great interest. Patterns might grow ever more complex, degenerate into noise, or evolve into the ultimate groove.
Published August 2010
Tuesday, August 22, 2017
Monday, August 21, 2017
Q. Do I really need to replace my windows to reduce noise?
Having just purchased my first house, I've found myself living on a busier road than I would have liked. My studio is at the front of the house and there is a reasonable amount of sound coming in through the old double‑glazing. I expect the windows are at least 15 years old and they have trickle vents at the top, which obviously mean a small portion of the frame is always 'open'. I've replaced all the hinges to get them to shut up tight, but it's still a bit too noisy for me.

Rather than fitting special 'acoustic' glass, it will be cheaper — and probably more effective — to add secondary glazing to your existing windows.
I've had a pretty expensive quote to get new glass in the front of the house and, from what I've read, having different depths of glass on either side of the sealed unit can help. This is 'acoustic' glass and is 10mm on one side and 6mm on the other, which seems quite high spec, as other companies offer 6mm x 4mm. The overall unit depth is 28mm. Their claim is that this will give, on average, 39dB of sound reduction.
Should I try to purchase a cheap dB-measuring device. or can I cobble something together with a decent mic and a laptop? I want to see how much reduction I have at the moment, to try and figure out if the investment is worthwhile. Also, do you have any experience with these 'acoustic glass' products? From what I know about glazing, the logic behind the design holds up. However, these windows are approximately two and a half times as expensive as a run‑of‑the‑mill window.

Once you've matched the sensitivity of two microphones, you can use them to measure how much attenuation a window is providing.
Via SOS web site
SOS Technical Editor Hugh Robjohns replies: The trickle vents (if left open, or if they have poor seals) will always be the downfall, regardless of how well specified, designed and installed the rest of the windows are. Unfortunately, planning regulations may require you to retain the trickle vents, depending on the age and design of the building, so it's worth asking that question of your window installer.
As for measuring the current level of attenuation, the easiest way would be with a simple sound-pressure level meter, the kind that costs around £16 from the likes of Amazon. Set it to slow response, A‑weighted, and obtain readings from about a metre in front of the window outside, and again from inside. The difference will give a reasonable idea of the attenuation provided by the window. This kind of simple meter is also excellent for setting up monitoring systems.
Alternatively, if you have two similar mics, a couple of very long cables, two preamp channels and a DAW of some sort, you could do the same thing with those. I'd start by placing one mic outside the window, facing the road and adjusting the preamp gain to get a sensible recording level you can then use to calibrate the sensitivity of the second mic.
Once you've established a reasonable recording level, bring that mic back indoors, stick it in front of a speaker that is producing a constant level tone of some kind and place the second mic alongside it. Adjust the gain of the second preamp, to match the signal level of the second microphone to that of the first. A really quick and easy way of doing this is to sum the two mics to mono and put a polarity inversion in the second mic. When the mic sensitivities are matched, the two signals will almost perfectly cancel each other out, so simply adjust the second preamp's gain for the deepest 'null'. Next, remove the polarity inversion and mono sum, take the first mic back outdoors and place it in front of the window looking at the road again. Set the second mic up inside the room looking at the window and record a few minutes of traffic noise with both mics.
All you need to do now is compare the average levels of the two recorded tracks to find out what level of attenuation the window is currently providing. The DAW meters will provide the information you need if you leave the peak hold indicators on. It might also be educational to close off and seal the trickle vents with gaffer tape to see what difference they make to the figures.
Assuming that the existing windows are in good condition, I suspect that replacing them with new ones — even the higher attenuation ones — won't make that much difference. Secondary internal glazing, adding a third layer to the window sandwich, is likely to be far more effective, but perhaps not as attractive and maybe not as convenient. You'd need something like a 10dB improvement just to make the ambient noise sound half as loud, and that's extremely difficult to achieve with normal domestic window designs.
Published July 2010
Saturday, August 19, 2017
Friday, August 18, 2017
Q. Is working with digital recordings harder than working with analogue ones?
In
the past few years, it seems that I have to work much harder to get
things to sit properly in a mix — to get the vocal or horns to just
blend with the rest of the track, rather than feeling 'stuck on top',
for example. What has crossed my mind is that I rarely (if ever) seemed
to find this an issue when I was working purely in the analogue realm.
Was I being helped by the losses in the analogue system to blend the
sounds? Is it harder to blend multitrack recordings in the digital
world? I'm a musician, really, but I think I've improved as an engineer
over time, so I should say that I'm not a total klutz at this. I do
usually manage to get things to blend, but it does take effort. Do you
have any tips for improving the situation?
Via SOS web site
SOS contributor Mike Senior replies: There are a lot of good reasons why recordings made entirely in the analogue domain often seem easier to glue together at mixdown. The compression side-effects of the tape recording medium often help to tame over‑spiky transients (especially on drums), which can be difficult to tuck into the mix otherwise. The progressive high‑frequency loss that tape‑recorded signals suffer after multiple playbacks helps push sounds further away from the listener too; the brighter a sound, the more it tends to pop out of the mix.
Background noise is an inevitable side‑effect of working in the analogue domain — not just on account of the tape itself, but also because of contributions from all the other processing equipment — and this combined noise floor usually makes it easier to blend a mix. To quote producer Steve Churchyard (in Howard Massey's book Behind The Glass), "Tape hiss doesn't bother me at all, never did. It's like the glue that holds the record together”. A little added distortion is also unavoidable in analogue setups, and this can be turned to advantage by experienced recording engineers to make sounds fuller and more present. Such sounds don't need to be faded up as high in the mix and are, thus, easier to balance.
One other factor a lot of people forget regarding analogue productions is that compression is more often done while recording, to make the best use of the tape's dynamic range and the available gear resources, and then many of those parts may be further compressed at the final mix. This kind of serial compression is typically better at levelling out performance levels than a single, more heavy‑handed, processing stage, so that can also affect blend and the overall sense of naturalness.
There are other factors that contribute to the analogue sound, but that's enough to be going on with at the moment! Let's start looking at how you can try to get similar effects in the digital domain. The bottom line is that you can't expect to use all the same techniques you used for your analogue mixes when working on an all‑digital production. So, for example, I normally find that I do a lot more work with tape emulation, saturation, clipping and specialist transient processors when mixing digital recordings, in order to bring the typically less‑rounded transients under control. Tape emulations are, of course, an option here also.
Adding background noise artificially can also help achieve more analogue‑style blend, and if you don't fancy sourcing your own noise recordings, there are a lot of places you can find suitable samples. Most media sound effects libraries have a selection of what are usually called 'room tone' or 'room ambience' files, which are the sound of nothing happening in various common environments; not the most interesting sounds, but they really help to make tracks feel as if they're all occurring in the same place. Vinyl noise is another good option, and I've found good examples in many sample libraries. Spectrasonics' Retrofunk (www.spectrasonics.com) and Tekniks' The Mixtape Toolkit (www.tekniks.co.uk) spring to mind immediately, but there are lots of others. The Swedish developers Retro Sampling (www.retrosampling.se) have made background noise something of a speciality, and you can get whole CDs full of different vinyl noises from them, plus they also do freeware Audio Impurities and Vinyl Dreams VST plug‑ins, which give a small taster of what their product range has to offer. There are other plug‑ins worth a look too, such as Izotope's Vinyl (www.izotope.com) and Cubase's built‑in Grungelizer, but be aware that some of these don't output everything in stereo, and mono noise won't help the blend nearly as much in this application. One other freeware plug‑in that you might try is Tweakbench's Field (www.tweakbench.com), which provides a selection of mixable room tones./BodyI>

Retro Sampling's Audio Impurities Vintage Edition and Tweakbench's Field are two freeware plug‑ins that can feed subtle background noise to your mix bus, thereby subtly improving your apparent blend.

Finally, it's pretty easy to create serial compression digitally, given the practically limitless plug‑in slots most sequencers are endowed with. My basic advice here is to use slower and gentler compression settings for the first compressor in the line, just to even up the levels, and then use faster and heavier compression only further along in the processing chain. If you do it the other way around, the fast compressor will usually cause too many audible processing artifacts, while the slow compressor won't have much dynamic range left to work with.
Thursday, August 17, 2017
Wednesday, August 16, 2017
Tuesday, August 15, 2017
Q. Why do I sometimes see singers using two microphones on stage?
I've noticed that, when I watch old concert footage, the singer is often using two mics. I'd always assumed that one was being used for recording purposes and one was being fed to the PA. However, I recently heard that the Grateful Dead used a two‑mic technique for noise cancelling, is this true, and how would it work?

Using two mics for noise cancellation. Combining outputs of both at equal gains, but in opposite polarities, will cancel ambient noise from each to a certain degree.
Via SOS web site
SOS Technical Editor Hugh Robjohns replies: You are quite right in that, back in the 1970s, it was quite common when recording a live concert for the recording people to simply tape a second mic to the PA vocal mic to acquire their recording feed. Mic splitters either weren't trusted back then or they were too expensive!
The two‑mic noise‑cancelling idea is well known and very common in many sound applications — most notably aircraft communication headsets — but is rarely seen these days in live sound and PA. The same basic physics explains why football commentators' lip ribbon mics work so well at rejecting the crowd noise.
The basic idea of the two‑mic technique is to have two microphones spaced a short distance apart (usually between one and two‑inches or two to six centimetres) in front of the mouth, or whatever the sound source is. Both microphones must be able to hear the sound source directly. If they are cardioids, they both need to face the sound source, although this is more usually done with omnidirectional microphones, for the following reasons. The ambient noise, being inherently diffuse sound, will be captured equally in level by both mics; their spacing will make no significant difference to the ambient sound level they capture. By contrast, the wanted sound will be in the near field of both mics and, provided the front mic is very close to the sound source (ie. near the lips of the vocalist), the inverse square law of sound‑energy dispersion means that the more distant mic will receive significantly less energy from the close sound source than the front mic will.

Accordions produce sound from two places — on most models from 'treble' and 'bass' ends — so it's important to recognise this when miking and set two microphones either side and slightly forward of the instrument.
This also helps to explain why omni mics are preferred in this role, because otherwise the close mic would have a far stronger bass response, due to the proximity effect, than the more distant mic, and odd tonal effects could result. By combining the outputs of both mics at equal gains but in opposite polarities, the similar level of ambient noise from each will cancel to a very large degree, whereas the significantly different levels of the wanted close sound from each mic will hardly cancel at all. Of course, there will be a slight level reduction of wanted sound in comparison to using just the close mic on its own but, given the 30dB‑plus of ambient noise reduction gained by this technique, that's usually a side‑effect well worth suffering when working in very noisy conditions.
The physical spacing between the two mics inherently introduces a small, but finite, time delay, and so when the two mic signals are mixed together, the frequency response will inevitably become comb filtered. However, if the distance between mics is only an inch or so, the first deep comb‑filter notch will be well above any significant, important component of the human voice, and the rest won't have any material effect on the sound quality either. To return to your original statement, this noise‑cancelling technique really requires two identical mics spaced a precise distance apart. Most of those old festival concert photos show completely dissimilar mics mounted with their capsules more or less coincident, which lends weight to the suggestion that they were for separate recording and PA feeds, rather than exotic noise‑cancelling techniques.
The Grateful Dead developed a version of this noise‑cancelling technique because of the very unconventional PA arrangements they used to employ, with all of the PA set up on stage behind the band as a 'wall of sound'. In this way the band heard exactly what the audience heard (no need for separate monitors!). It was a clever system, with each musical source having its own set of amps and speakers to improve headroom and minimise distortion.
Published July 2010
Monday, August 14, 2017
Saturday, August 12, 2017
Q. How do the different amp classes work?
I'm trying to learn a little more about amp design. One thing that
really baffles me is the different classes available. What does an amp's
class mean, and how does this affect the way it is used?
Via SOS web site
SOS Technical Editor Hugh Robjohns replies: In a Class‑A circuit, the active device (whether valve or solid‑state) passes current regardless of the polarity of the input signal; in other words, in an audio application, it is 'biased' so as to pass both the positive cycle and the negative cycles of an audio signal. The side effect of the biasing is that the active device has to pass current all the time, making it relatively inefficient.
In a Class-B circuit, the active device only passes current for one polarity of input signal — which polarity depends on the circuit design — and this makes it a much more efficient way of working. So, in this case, where it is required to pass a symmetrical audio signal using a Class‑B circuit, the circuit will need two active devices, one to handle each polarity. This is an arrangement often also known as 'push‑pull'.
Class C is a format that only conducts on signal peaks and is rarely (but occasionally) used for audio in situations where power efficiency is more important than distortion. Class D — which is now becoming very popular in audio applications — works by generating a stream of high-voltage pulses at a very high frequency. These pulses are modulated in such a way that the average energy they convey follows the wanted audio waveform.
Returning to the Class-B design, this exhibits a problem called crossover distortion for audio applications, because both of the active devices in the push‑pull pair turn off as the signal nears the zero line. The solution is to bias the devices so that they don't turn off. They actually continue to pass signal as it crosses over into the opposite polarity. In other words, it works a little more like a Class-A device (but without the same levels of power inefficiency).

In a push‑pull amp design, each active device handles one polarity of the input signal.
Hence the compromise name Class AB; it is a Class-B design biased to operate in a similar way to Class A around the crossover region. However, it should also be remembered that push‑pull designs can also be operated fully as Class A if required, and some high‑power amps do work in that way. This is also a handy technique for cancelling out even-harmonic distortion products in tube-amp designs.
Published August 2010
Friday, August 11, 2017
Thursday, August 10, 2017
Q. How can I improve acoustics in a long, thin room?
The diagram to the right shows my room, which serves as my studio.
The dimensions seem to be bad for low frequencies and there are
sound-pressure failures at 55Hz and between 110 and 140 Hz. I have an
Auralex foam bass trap, but I don't known if absorption is the answer.
What should I do to improve this situation?

If you have any choice of rooms for your studio, try to avoid those whose dimensions are multiples of each other.
Via SOS web site
SOS columnist Martin Walker replies: I agree: that's a bad choice for a room, dimensionally, as far as acoustics are concerned. The 2.6‑metre width and 2.5‑metre height are nearly identical, while the 5.8‑metre length is close to double these, giving you a shape that's almost two cubes joined together. The room is also relatively small, which will mean it'll have relatively few modes below a few hundred hertz and, as the dimensions are closely related to each other, these modes will pile up at some frequencies (resulting in a huge peak), with large gaps between them (creating big dips in the frequency response).
Room-mode frequencies are fairly easy to calculate, but it's even easier to plug your three dimensions into a utility, such as the on‑line MCSquared Room Mode Calculator (www.mcsquared.com/metricmodes.htm) or the Hunecke Room Eigenmodes Calculator (www.hunecke.de/en/calculators/room‑eigenmodes.html). However, if you've got a PC, the ModeCalc utility from Realtraps (www.realtraps.com/modecalc.htm) is one of the easiest to use, displaying the first 16 axial modes for each room dimension up to 500Hz in an easy-to-interpret graphics plot. It would show that the biggest gaps in your room mode plot occur between 30 and 60 Hz (which explains your hole at 55Hz), between 70 and 90 Hz, and again between 90 and 130 Hz (the other area you've already pinpointed).
Without acoustic treatment, your listening position will be very critical, since you can end up sitting in a bass trough at one frequency and a huge peak at another. However, your loudspeakers and listening position do look to be near their optimum locations for the flattest compromise response. The oft‑quoted ideal is to place your listening position (ears!) close to 38 percent into the room from the front wall.
Acoustic-foam bass traps, like the one you already have, can certainly be effective, and acoustic foam is also excellent for dealing with mid-/high-frequency early reflections from your side walls and ceiling. However, acoustic foam is invariably a lot less dense than the 60kg/m3 Rockwool that is generally recommended for DIY bass traps, and you will, therefore, require a much greater volume of it to achieve a similar amount of absorption at lower frequencies. In a small room, you'll simply run out of space before you can cram in enough acoustic foam traps to adequately deal with the problems.
Diffusion can be a good way to 'break up' your reflections so they become less troublesome, but you ideally need to be at least a couple of metres away from them to avoid hearing a set of discrete reflections, rather than a more diffuse soundfield, so they are not often used in small rooms like yours. Tuned traps also have their place in the grand scheme of things but, in my experience, tend to be more difficult to tune and place optimally compared with broadband trapping that you simply fit where the bass levels are loudest, so they absorb the sound more efficiently.
Overall, I think broadband absorption is your best bet; as much of it as you can reasonably fit into your room. Start by placing traps that straddle the front vertical corners of the room, then the rear vertical corners, followed by any other corners you can manage, such as the ceiling/wall corners, and even the floor/wall corners where feasible. Also, don't forget some side panels and ceiling 'cloud' at the 'mirror points' to deal with early reflections.
Published August 2010
Tuesday, August 8, 2017
Saturday, August 5, 2017
Friday, August 4, 2017
Q. Is phasing affecting the sound of my double-tracked vocals?
I've been reading about how you have to be quite precise in matching the distance from source to mic when multi‑miking guitar cabinets, and something occurred to me. If this kind of phase alignment is so important in this instance, how can we avoid such issues when double‑tracking a vocal, given that the singer inevitably moves their head around? The singer in question here is me, and I tend to move around a fair bit when singing! I've noticed when lining up and trimming my doubled vocals in the past (and on my current song) that some words sound 'different' when combined than others, and by different I mean 'worse'. Could phasing be the underlying cause, and if so, is there anything I can do to rectify this?
 already provide extensive database 'tagging' systems for just that purpose.")
Sorting your sample library into nested folders is an excellent way to help you find what you're looking for more quickly, but some software samplers (like NI's Kontakt 4, shown here) already provide extensive database 'tagging' systems for just that purpose.
Via SOS web site
SOS contributor Mike Senior replies: Yes, if you double‑track very closely, you'll inevitably get some phase‑cancellation between the two layers, but that's not a problem; it's an inherent part of what makes double‑tracking sound the way it does. However, the potential for phase cancellation between the parts won't be nearly on the same scale as with the two signals of a multi‑miked guitar amp, because, firstly, the waveforms of two different vocal performances will never match anywhere near as closely; and, secondly, the phase relationship between the performances will change from moment to moment, especially if you're moving around while singing. Furthermore, in practice a vocal double‑track often works best when it's lower in level than the lead, in which case any phase‑cancellation artifacts will be much less pronounced.
For these reasons, nasty tonal changes from double‑tracking haven't ever really presented a major problem for me, and if they're regularly causing you problems, I suspect you might be trying to match the layers too closely at the editing stage. Try leaving a little more leeway for the timing and see if that helps for a start — just make sure that the double‑track doesn't aniticipate the lead if you don't want it to draw undue attention to itself. Similarly, try to keep pitch‑correction as minimal as you can (especially anything that flattens out the shorter‑term pitch variations), because that will also tend to match the exact frequency of the two different waveforms. In fact, if there are any notes that sound really phasey to you, you might even consider shifting one of the voices a few cents out of tune to see if that helps. Anything you can do to make the double‑track sound less similar to the lead can also help, whether that means using a different singer (think Lennon and McCartney), a different mic, or a different EQ setting. You may only need the high frequencies to provide the double‑tracking effect, and these are unlikely to phase as badly as the low frequencies.
Published February 2010
Thursday, August 3, 2017
Wednesday, August 2, 2017
Q. Do balanced connections prevent ground loops?
I've carefully wired up my gear using all balanced inputs and outputs, and proper balanced cables, but I'm still getting occasional digital hash in the background. What have I missed?

Even with balanced cables you can sometimes experience ground loops, so here's the best place to break one without risking RF interference.
Jamie, via email
SOS columnist Martin Walker replies: Ground‑loop problems can be absolutely infuriating, and I wrote a step‑by‑step guide to tracking them down back in SOS July 2005 (/sos/jul05/articles/qa0705_1.htm). In essence, you have to temporarily unplug all the cables between your power amp and mixer. If the noises go away, you've found the location of your problem. If not, plug them back in and try unplugging whatever gear is plugged into the mixer — and so on down the chain.
The majority of ground‑loop problems occur with unbalanced connections, so my next advice would have been to replace the offending unbalanced cable with a balanced or pseudo‑balanced version. However, as you've found, sometimes such problems occur even in fully balanced setups where you carefully connect balanced outputs of one device to balanced inputs of another via 'two‑core plus screen' balanced cables.
I recently had just such a problem in my own studio and, to make it even worse, it was an intermittent one, so whenever I got close to discovering its cause, it mysteriously vanished again. Here's what I did to track it down, so others can try some similar detective work in their own setups.
First of all, you've got to be systematic, and note down everything you try, particularly with an intermittent problem, so you don't have to start from scratch every time it occurs. In my case, I could hear the digital low‑level hash through my loudspeakers even with my power‑amp level controls turned fully down, and it also persisted when I turned off the D‑A converter box feeding my power amp. However, it completely disappeared as soon as I disconnected both cables between the D‑A output and power amp input.
These quick tests confirmed that the noise wasn't coming from the output of the converter, or from the power amp itself, but instead from a ground loop completed when the two were connected. However, just like you, I was already using balanced cables. I double‑checked the wiring of both of my XLR balanced cables and there were no errors: the screen of the cable was connected to pin 1 at each end, the red core connected to pin 2 at each end, and the blue (or black) core to pin 3 at each end. So far, so good.
Next, I double‑checked with a multimeter that there was no electrical connection between the metalwork of the two devices via my equipment rack (a common source of ground‑loop problems, and curable by bolting one of the devices to the rack using insulated washers or 'Humfrees'). Again, there was no problem.
The best wiring for balanced audio equipment is to tie the cable screen to the metal chassis (right where it enters the chassis) at both ends of the cable, which guarantees the best possible protection from RFI (Radio Frequency Interference). However, this assumes that the interconnected equipment is internally grounded properly, and this is where things can go awry. The cure is to disconnect one end of the cable screen, and the best choice to minimise the possibility of RFI is the input end (as shown in the diagram).
By this time, my intermittent problem had disappeared again, so here's another tip. I carefully cut the screen wire of one of my two cables just before it arrived at pin 1 of the XLR plug, but left the other cable unmodified. Then, the next time the ground loop problem occurred a few days later I quickly unplugged the unmodified cable, whereupon the noise disappeared immediately. This proved that I'd correctly tracked down the problem, and modifying the other cable in the same way ensured that it never happened again.
Published January 2010
Tuesday, August 1, 2017
Q. How do I know a mic is worth the money?
What
differences can you hear when comparing inexpensive and expensive
equipment? As I do a lot of vocal recording, I'd like to splash out on
a really good microphone. But how can I be sure that an expensive
microphone is worth the money? What am I listening for?
Sarah Betts, via email

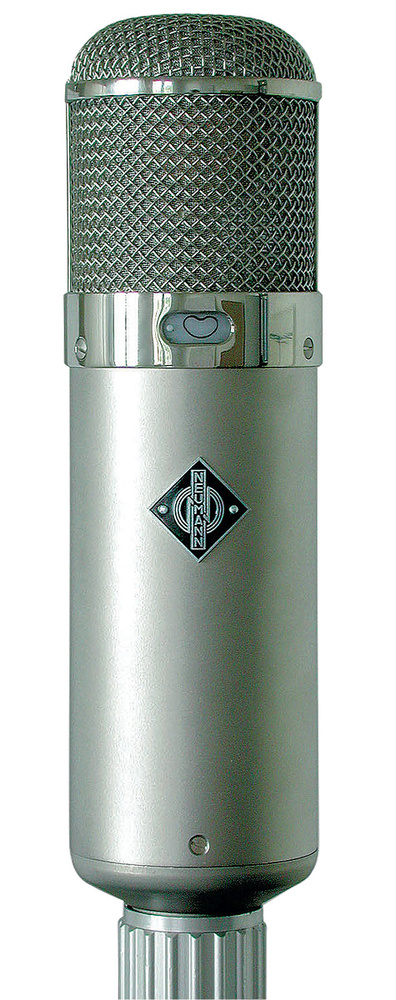
Fidelity and accuracy are expensive qualities to build into a microphone, so those are the areas that will generally improve as you increase your budget. However, this doesn't necessarily mean that your voice will sound better through a more expensive mic; it's more important that you find the right mic to suit you. Bono, for example, famously favours the inexpensive Shure SM58 over high‑end alternatives.

SOS Technical Editor Hugh Robjohns replies: The benefits extend far wider than just the sound, but basically you're listening for an improvement over your current mic, and you then need to decide if the price justifies that improvement, bearing in mind the law of diminishing returns. Going from a very low‑budget mic to a mid‑range mic will usually bring about very obvious sound improvements. Going from there to a high-end model will bring smaller improvements, which may not always be obvious. And going from there to a mic worth several thousand dollars will bring smaller benefits still. Some people will believe the improvements are worth the expense, others won't!
However, you'll know immediately and quite instinctively when you find a mic that is well suited to your voice, and that doesn't always mean the mic needs to be expensive. If you're looking for a general-purpose mic, expensive usually equates to increased flexibility in use. But if it's a mic that will always be used on your voice and nothing else, finding a mic that suits your voice is the prime directive.
Sonic fidelity or accuracy is generally an expensive thing to engineer into a microphone, and the most expensive mics are generally pretty accurate. But recording vocals is rarely about accuracy. It's more to do with flattery, and different voices need to be flattered in different ways. When working with a new vocalist, I'll usually try a range of mics to see which one works best with their voice. Sometimes the most expensive mic gives the best results, but it's equally likely that it will be a less expensive model. U2's Bono famously records his vocals using a Shure SM58, and he seems happy with the results!
But, as I said, there's more to an expensive mic that just the sound. More expensive mics tend to be built to higher standards. They tend to include internal shock-mounting for the capsule, to reduce handling noise. They are thoroughly tested to comply with the design specifications and provide consistent results. Being better constructed, they tend to have longer working lives and can be maintained by the manufacturer relatively easily. They also generally deliver a very usable (although that might not necessarily equate to 'the best') sound whatever the source, without needing much EQ to cut through in the mix.
Less expensive mics often sound great on some things but terrible on others, often needing a lot of EQ to extract a reasonable sound within a mix. Often they're less well manufactured, which reduces their working life expectancy and, once broken, can rarely be repaired.
Sarah Betts, via email

Fidelity and accuracy are expensive qualities to build into a microphone, so those are the areas that will generally improve as you increase your budget. However, this doesn't necessarily mean that your voice will sound better through a more expensive mic; it's more important that you find the right mic to suit you. Bono, for example, famously favours the inexpensive Shure SM58 over high‑end alternatives.
SOS Technical Editor Hugh Robjohns replies: The benefits extend far wider than just the sound, but basically you're listening for an improvement over your current mic, and you then need to decide if the price justifies that improvement, bearing in mind the law of diminishing returns. Going from a very low‑budget mic to a mid‑range mic will usually bring about very obvious sound improvements. Going from there to a high-end model will bring smaller improvements, which may not always be obvious. And going from there to a mic worth several thousand dollars will bring smaller benefits still. Some people will believe the improvements are worth the expense, others won't!
However, you'll know immediately and quite instinctively when you find a mic that is well suited to your voice, and that doesn't always mean the mic needs to be expensive. If you're looking for a general-purpose mic, expensive usually equates to increased flexibility in use. But if it's a mic that will always be used on your voice and nothing else, finding a mic that suits your voice is the prime directive.
Sonic fidelity or accuracy is generally an expensive thing to engineer into a microphone, and the most expensive mics are generally pretty accurate. But recording vocals is rarely about accuracy. It's more to do with flattery, and different voices need to be flattered in different ways. When working with a new vocalist, I'll usually try a range of mics to see which one works best with their voice. Sometimes the most expensive mic gives the best results, but it's equally likely that it will be a less expensive model. U2's Bono famously records his vocals using a Shure SM58, and he seems happy with the results!
But, as I said, there's more to an expensive mic that just the sound. More expensive mics tend to be built to higher standards. They tend to include internal shock-mounting for the capsule, to reduce handling noise. They are thoroughly tested to comply with the design specifications and provide consistent results. Being better constructed, they tend to have longer working lives and can be maintained by the manufacturer relatively easily. They also generally deliver a very usable (although that might not necessarily equate to 'the best') sound whatever the source, without needing much EQ to cut through in the mix.
Less expensive mics often sound great on some things but terrible on others, often needing a lot of EQ to extract a reasonable sound within a mix. Often they're less well manufactured, which reduces their working life expectancy and, once broken, can rarely be repaired.
Published March 2010
Subscribe to:
Posts (Atom)